


No Space? No Problem! Simple DIY Vertical Gardening Ideas for Beginners
Do you dream of a lush garden but feel limited by a tiny balcony or compact backyard? You’re not alone. Thousands of urban dwellers face the same challenge, but there’s a brilliant solution that transforms vertical surfaces into thriving green spaces. DIY Vertical Gardening is revolutionizing how we grow plants at home, allowing you to cultivate herbs, vegetables, and flowers even in the smallest spaces. This innovative approach maximizes your growing area while adding stunning visual appeal to walls, fences, and balconies. Whether you’re a complete beginner or an experienced gardener looking to optimize space, vertical gardening offers an accessible, affordable, and rewarding way to grow your own food and beautify your environment.
Materials & Supplies
To start your vertical gardening journey, you’ll need several essential materials:
Structural Materials:
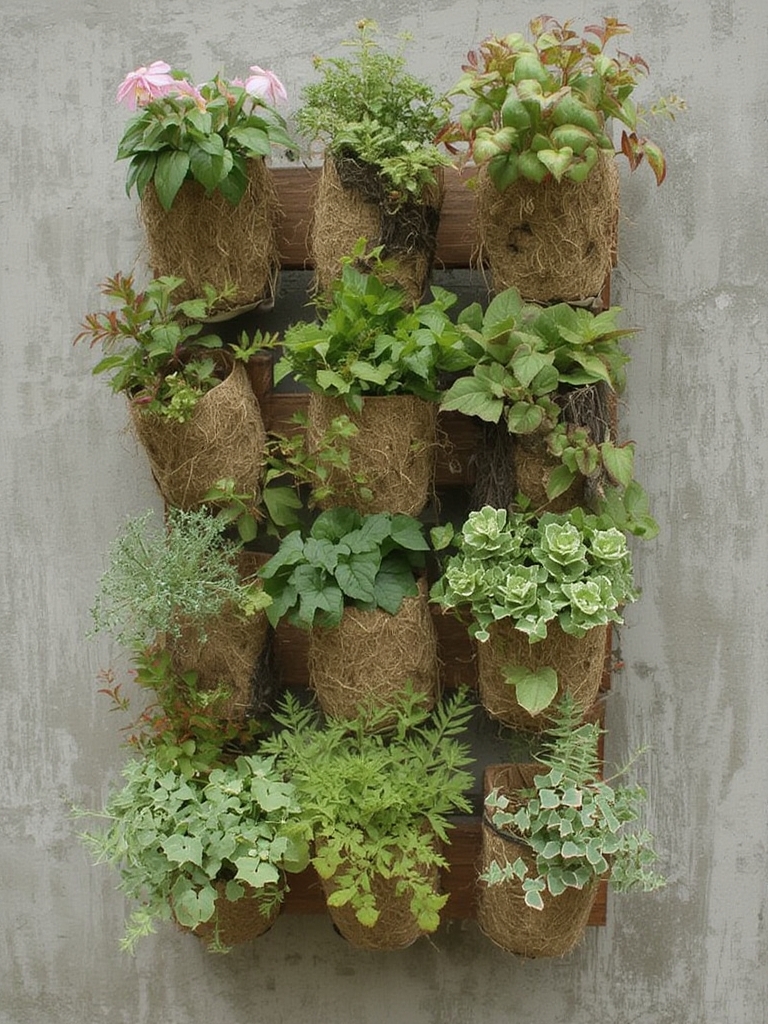
- Wooden pallets, wall-mounted planters, or hanging pocket organizers
- Mounting brackets, screws, and wall anchors appropriate for your wall type
- Landscape fabric or weed barrier cloth
- Wire mesh or chicken wire for support
Growing Essentials:
- High-quality potting mix (not garden soil, which is too heavy)
- Compost or organic fertilizer
- Seeds or seedlings of your chosen plants
- Drainage trays or collection systems
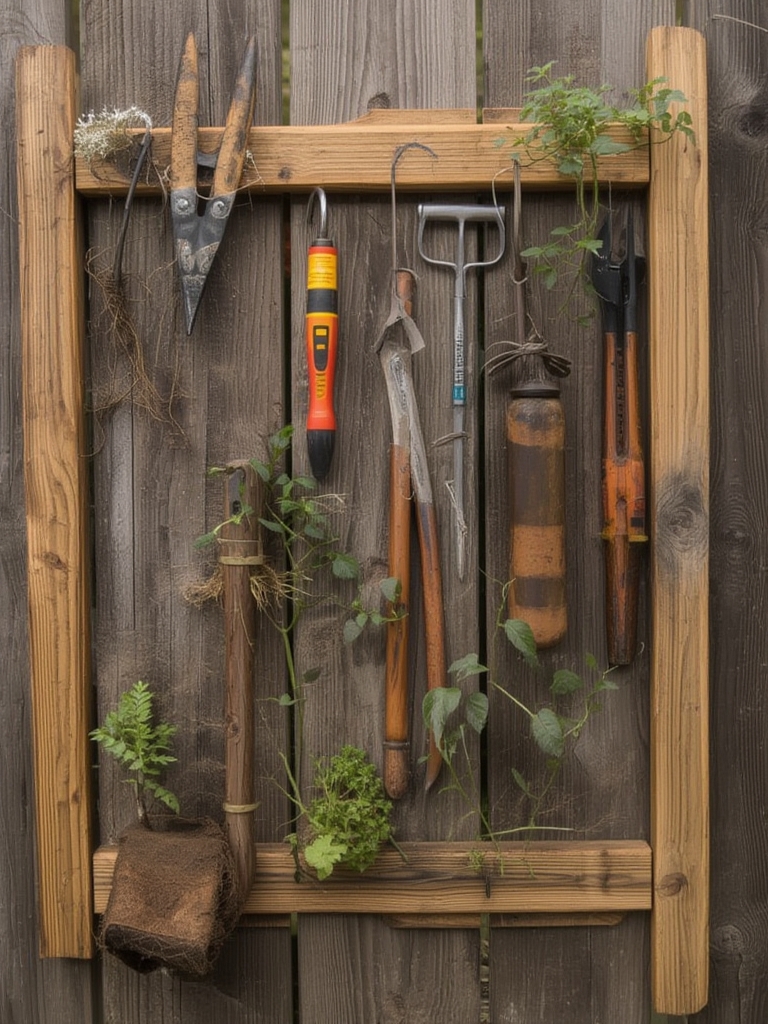
Tools:
- Drill with appropriate bits
- Staple gun
- Level and measuring tape
- Garden trowel and gloves
- Watering can with a narrow spout or drip irrigation system
Optional Items:
- Self-watering planters to reduce maintenance
- Grow lights for indoor vertical gardens
- Decorative frames or painted pallets for aesthetic appeal
Timing / Growing Schedule
Vertical gardens can be established year-round, but spring offers ideal conditions for most plants. Initial setup takes approximately 2-4 hours depending on complexity. Most herbs and leafy greens germinate within 7-14 days and reach harvestable size in 4-8 weeks. Strawberries and cherry tomatoes require 60-90 days from transplanting to first harvest. Unlike traditional gardens requiring seasonal preparation, vertical systems allow staggered planting throughout the growing season, providing continuous yields. Plan your vertical garden installation on a weekend, allowing plants to establish before peak summer heat or winter cold.
Step-by-Step Instructions
Step 1: Choose Your Location
Select a wall or fence receiving 4-6 hours of sunlight daily. Ensure the structure can support the weight of your garden when fully watered (approximately 15-20 pounds per square foot).
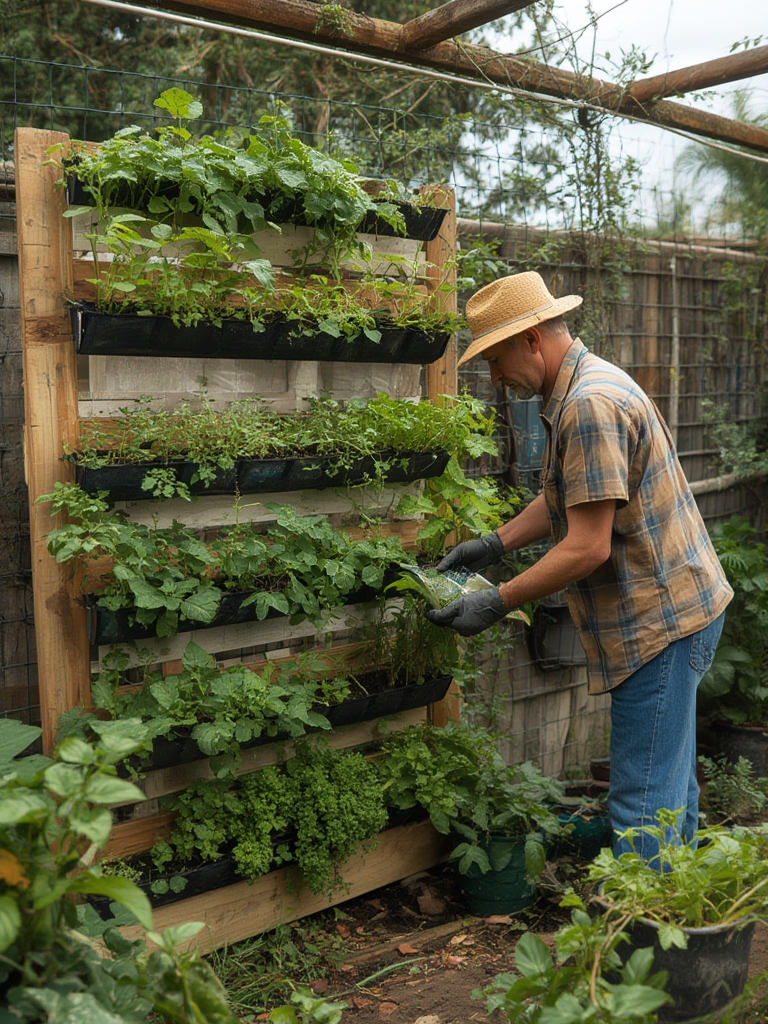
Step 2: Prepare Your Vertical Structure
For pallet gardens, sand rough edges and attach landscape fabric to the back and bottom using a staple gun. This creates pockets for soil retention. Ensure drainage holes exist.
Step 3: Secure the Structure
Mount your vertical garden securely using heavy-duty brackets. Use a level to ensure proper alignment, which helps water distribute evenly.
Step 4: Add Growing Medium
Fill pockets or containers with potting mix, leaving 1-2 inches from the top. Mix in compost for added nutrients. Slightly moisten the soil before planting.
Step 5: Plant Strategically
Place plants requiring more water at the bottom, as water naturally drains downward. Position herbs, lettuce, and strawberries in upper sections. Create your vertical herb wall by grouping basil, parsley, and mint together.
Step 6: Water Carefully
Water from top to bottom, allowing moisture to cascade through layers. Check soil moisture daily until plants establish, then adjust to every 2-3 days.
Nutritional Benefits / Advantages
Growing vertically provides numerous advantages beyond space-saving gardening ideas. Vertical gardens improve air quality by filtering pollutants and producing oxygen in concentrated areas. They reduce urban heat island effects and provide insulation to exterior walls, potentially lowering cooling costs. Freshly harvested herbs and vegetables retain maximum nutritional value, containing higher vitamin and antioxidant levels than store-bought produce. The physical activity of maintaining your garden promotes cardiovascular health and reduces stress. Additionally, vertical gardens make harvesting easier on your back and knees compared to traditional ground-level beds.
Tips, Alternative Methods, or Gardening Advice
For those seeking a complete pallet garden tutorial, remember that pallets must be heat-treated (marked “HT”), not chemically treated. Alternatively, use shoe organizers hung on walls for ultra-budget-friendly vertical gardens. In shaded areas, focus on lettuce, spinach, and herbs rather than fruiting plants. Install drip irrigation systems with timers for low-maintenance watering. Rotate crops seasonally—cool-season greens in spring/fall, heat-loving tomatoes and peppers in summer. For indoor vertical gardens, position near south-facing windows or supplement with LED grow lights. The key to grow more in less space is selecting compact varieties specifically bred for container growing.
Common Mistakes to Avoid
Overwatering: Vertical gardens drain quickly but retain moisture in pockets. Check soil moisture before watering rather than following a rigid schedule.
Ignoring Weight Capacity: Ensure your mounting system supports wet soil weight. Reinforce structures before problems develop.
Poor Plant Selection: Avoid deep-rooted vegetables like carrots in shallow vertical systems. Choose appropriate plants for your structure depth.
Inadequate Drainage: Without proper drainage, root rot develops quickly. Always include drainage holes and layers.
Neglecting Fertilization: Frequent watering leaches nutrients faster than traditional gardens. Apply liquid fertilizer every 2-3 weeks.
Storage / Maintenance Tips
Harvest herbs regularly by trimming no more than one-third of the plant, encouraging bushy growth. Store fresh herbs in damp paper towels inside sealed containers for 5-7 days. Leafy greens keep 3-5 days when refrigerated in breathable bags. Check vertical gardens daily during hot weather, as they dry faster than ground-level gardens. Prune dead foliage immediately to prevent disease spread. Refresh potting mix annually and add compost monthly. In winter, protect outdoor vertical gardens with frost cloth or move containers indoors. Clean structures between seasons to prevent pest and disease carryover.
Conclusion
DIY Vertical Gardening transforms limited space into productive, beautiful growing areas that anyone can create and maintain. By following these straightforward steps and avoiding common pitfalls, you’ll soon harvest fresh herbs, vegetables, and flowers from your own vertical oasis. The beauty of vertical gardening lies in its flexibility—start small with a single pallet or hanging planter, then expand as your confidence grows. Ready to reclaim your vertical space? Share your vertical gardening success stories in the comments below, and explore our related posts on container gardening and urban farming techniques!
FAQs
Q: What are the best plants for beginner vertical gardeners?
A: Start with herbs like basil, mint, and parsley, along with lettuce, strawberries, and cherry tomatoes. These establish quickly, require minimal depth, and tolerate the faster drainage of vertical systems.
Q: How much does a DIY vertical garden cost?
A: Basic pallet gardens cost $20-50 in materials, while pre-made vertical planters range from $50-200. Repurposing materials like shoe organizers can reduce costs to under $15.
Q: Can I create a vertical garden indoors?
A: Absolutely! Choose a sunny window or add LED grow lights. Focus on herbs and leafy greens that thrive in controlled environments. Ensure adequate air circulation to prevent fungal issues.
Q: How often should I water my vertical garden?
A: This depends on climate, plant types, and container size, but most vertical gardens need water every 1-3 days. Check soil moisture daily until you understand your system’s specific needs.
Q: Will my vertical garden damage my wall?
A: Properly installed systems with correct mounting hardware won’t damage walls. Use waterproof barriers between wet soil and walls, and ensure brackets are anchored to studs, not just drywall.